First the F972 bottom skin gets clecoed in place. The angle on the aft side of the firewall is marked, and holes in the bottom skin as well as measurements from the forward end of the side skin determine when the firewall is properly placed.
Here I'm installing the bottom skin.
 |
| From Fuselage |
 |
| From Fuselage |
This is a view forward from the inside. The hole in the middle is for a recessed stainless box that will make room in the engine compartment for the propellor governor (if you want to go constant speed - I'm not).
 |
| From Fuselage |
Takes about an hour to drill the firewall - it's stainless, so you have to use a slow speed and lots of Boelube or you'll kill your bits and the stainless will work harden to the point that it's nearly undrillable. Thankfully I didn't do that.
Once that's done, the bottom skin is removed and marked to cut the holes for the main landing gear.
I scanned the plans and made a template (2 actually, one reversed) that I glued to the skins to use as a cutting guide for the clearance holes. I laid it over the plans on a window to confirm that it was exactly the right size.
Here's the template glued down and the hole roughed (very roughly) cut out with a hole saw. Final sizing was done with a rounded mill bastard file.
 |
| From Fuselage |
Here's the template glued down and the hole roughed (very roughly) cut out with a hole saw. Final sizing was done with a rounded mill bastard file.
 |
| From Fuselage |
 |
| From Fuselage |
This is the bottom skin and main gear from the outside. Some more will probably have to be taken off, but I want to make it as tight as possible, so no further fitting will be done until the gear go in for the final install.
 |
| From Fuselage |
Once that was done, I removed the bottom skin to make it easier to access the inside, and started work on the auxiliary longerons.
 |
| From Fuselage |
One leg gets cut off at the aft end to clear the gear bracket assembly that will be installed there later. It also requires a slight twist (you have to twist it a lot further than you think to put a small twist in it.
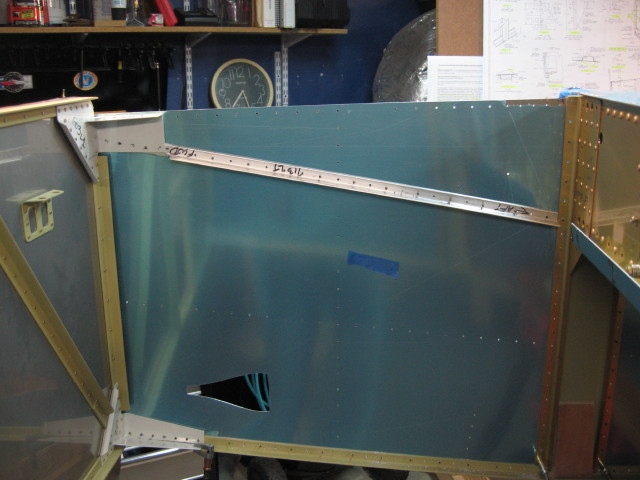
Starting to fabricate the F917 Longeron. You need a left and a right so you have to pay attention to which one you're working on and make 2 that are mirror images of each other.
 |
| From Fuselage |
Laying them side by side to make sure I make the second one a different "handedness" than the first.
 |
| From Fuselage |
I ran into a quandary around this point. I did the entire right longeron first, then test fit it. It pretty came out per the plans (which state that the vertex should roughly parallel the bottom of the side skin with about 1/8" showing).
Mine was 3/32", which is pretty much bang on.
 |
| From Fuselage |
After I finished the second (left) F917 I noticed that it was nearly even with the bottom edge of the skin. Only 1/32" was showing.
 |
| From Fuselage |
That made me nervous.
I know there is room for variation - it's not like we're building a watch as some folks like to say, but this is a critical juncture and an important one since we're establishing the firewall with the longerons and misalignment could do funny things (although I remeasured the firewall and it was bang on - which I expected since I measured it at least half a dozen times before drilling it).
I finally figured out the skin was a bit lower on that side and shot an email off to Van's as well as posting a question in the forums at VAF. The consensus (and my thought) was that it was fine but I wanted to check.
Ken Scott got back with me Monday and said he saw no problems with it so I ended up drilling them to the firewall brackets Monday.