Between work, a college road trip for Becca, things that needed fixing around the house and taxes, I haven't had time to do any updates. I'll just do one big one and go from there.
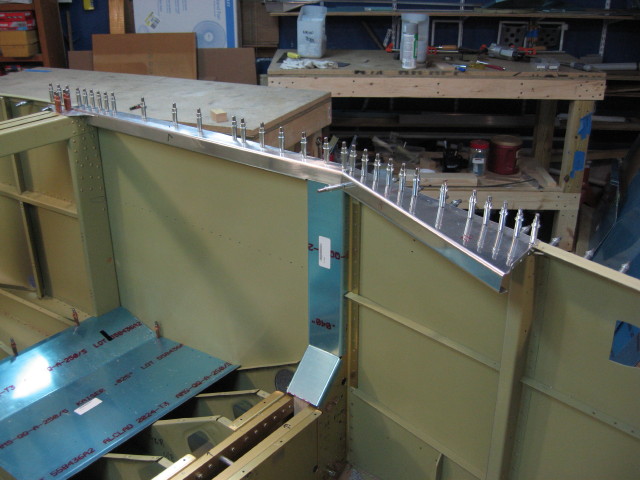
So I finished up the spacers, triple checked the level, and riveted the aft deck/spacers to the tail cone.
Here is the aft deck after finishing up the riveting. About a week later, I realized I should have riveted the
sides to the longerons along this line. It would have been a lot easier.
The next task is to start working on the side rails, forward canopy decks and gusset. The first thing to do is slot the side rail to allow the gusset to fit (this is for a slider - tip up canopy is different).
Once the slot is correct, the gusset will fit and can be drilled and the curve laid out for trimming.
|
Starting to trim the gusset to match the callout on the plans.
Gusset after trimming, deburring and match drilling to longerons and existing bulkhead.
After finishing the gusset, the forward canopy decks need to be fitted and match drilled to the longerons.
Here's the whole thing once it's done. You do both the left and right sides obviously.
I went ahead and did the forward gussets as well. These get drilled to the longerons and the firewall angle.
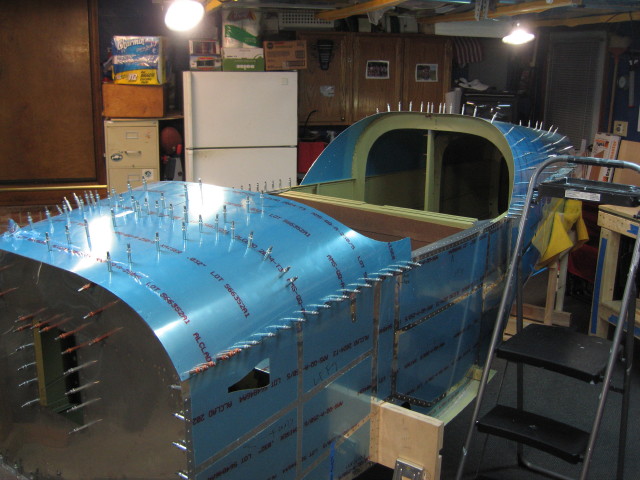
Before riveting everything, I decided to install the aft and forward top skins. I wanted to make sure I knew exactly how it went together so I could get a sense of what was coming next and how it all fit. I also wanted to make sure I didn't leave any open rivets that I could rivet now, as well as avoiding riveting something that I shouldn't.
Also an excuse to really see how it all goes together and sit in it.