Friday, October 21, 2011

October 22, 2011

Now that the wing stand is complete, I'm ready to continue with the left wing assembly.

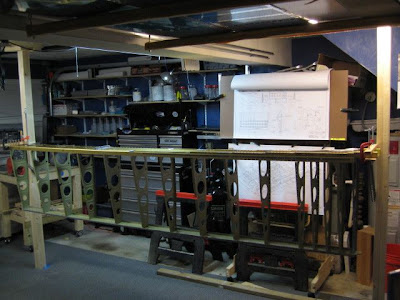
Worked on the left wing this week. Top skins (W927 doubler, W902 inboard and W903 outboard) and "J" stringer. Also fitted and match drilled the bottom inboard and outboard skins (W904 and W905 respectively).

Fitting and match drilling the upper skins and doubler. I put the leading edge on the left side just to see how it would look.

From Left Wing


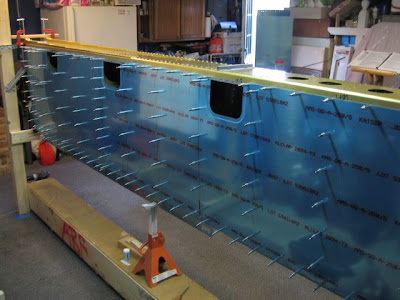
Back side (bottom in this case) of the left wing while I'm working on the top skins. The leading edge of the wing is up. The inboard side (that eventually attaches to the fuselage) is left. The fuel tank will be fabricated later and will be attached to the upper left of this structure. The fuel tank doubles as the inboard leading edge of the wing.

From Left Wing


From Left Wing


Working on the "J" stringers. The stringer is in the middle of the photo up against the skin - they sit in a slot cut in the rib. These are free floating (they are riveted to the skin, but nothing else) and serve to stiffen the top skins and add additional strength.

From Left Wing


Working on the bottom skins. The cutouts are for access panels that will be added later. They will be used during annual inspections as well as allow access to wiring and control linkages.

From Left Wing

October 15, 2011

Got quite a few things accomplished this week. Finished riveting the main ribs to the main and rear spars. Thought a lot about wiring (decided to go with Van's black nylon conduit using their method of drilling a 3/4" hole in the rib web between the first and second lightening holes). Drilled and deburred the conduit holes. Built the wing stand that will hold the wing during skin work and final riveting.

Laying out the wing stand on the floor to make sure everything will fit. It turned out that I was able to keep both work tables (I originally thought I'd have to disassemble one) by placing the stand about 2' from the edge and putting casters on both tables. Everything fits great and Patti can still get the Ody in the garage.

From Left Wing


Here's the attach structure to the roof of the garage. The garage door on my side will be inop until I finish with the wings. This is sitting right in the path of the door. It will only open about 3 feet now.

From Left Wing


The wing stand mostly complete and with the spar assembly hanging from it. I ended up tweaking quite a bit more since things are pretty tight and you have to be able to attach skins and things in between all the support structure.

Van recommends a 4x4. I ended up making mine from 2 2x4x8' stock - it was better wood. Put some Titebond on it and 3" screws and it is super strong. Dead straight as well.

From Left Wing

Wednesday, October 5, 2011

Oct 8th, 2011

Working on the wing this week. After *finally* getting the ribs, rear spar and doublers (at least most of them) primed last week I'm finally able to start working on the left wing assembly.

Technically you're supposed to cleco everything together and match drill. I like to go a bit beyond and trial fit a bit more just to get a feel for how everything goes together and as a sanity check to make sure everything looks reasonable and I have a good understanding of what is happening.

Here's the wing with the nose ribs, main ribs and "J" stringer put together.

From Left Wing


From Left Wing


Riveting the main ribs to the rear spar.

From Left Wing


Riveting the main ribs to the front spar. These guys take some doing because it's fairly tight by the ribs, they're big rivets and you don't want to jimmy up the spar by bouncing the gun or the bucking bar.

From Left Wing


Closeup of some finished rivets.

From Left Wing


Wed evening after it was too late to rivet any more I did a test fit of the skins to see how they fit and make sure everything was aligned properly. Looks a lot more like a wing this way.

From Left Wing