I was originally going to mount the engine a few weeks ago but realized that if I did that I would have a very hard time doing work on some other items with the engine in the way, so I decided to go ahead and do the battery box, solenoids and gascolator.
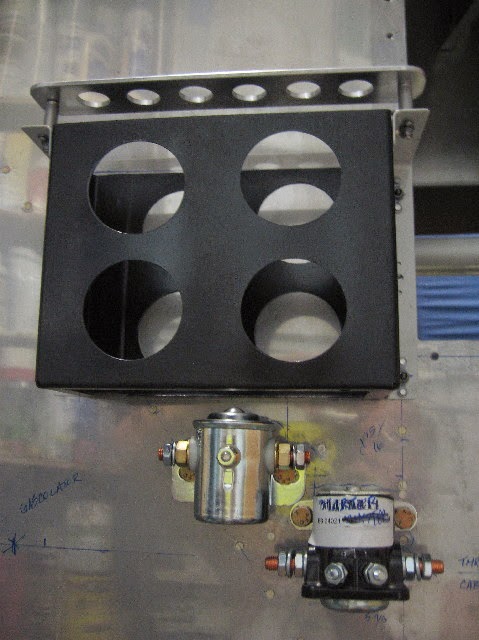
The battery box is a later model - they still give you a mount for an older style (and larger) lead acid battery, but the newer FWF kits have a mount for an Odyssey PC680 which is a RGM battery, and is both lighter and smaller.
The mount is steel, and you can drill lightening holes in it if you want (I did). There are a couple of brackets that get riveted on the ends, and it mounts to the firewall on 3 nutplates that are spelled out in the plans. Wish I'd noticed those when I was working on the FW, it would have been easier.
This is the box after lightening, riveting on the brackets and repainting.
The battery box is bolted to the firewall with some nutplates - they have you drill out some rivets that were previously installed when doing the firewall. Locations are spelled on in the plans.
There is a doubler plate for the solenoid mounts with nutplates on the aft side of the firewall. A couple of the nutplates are installed on some of the reinforcing angles.
Clecoed the box in place with the solenoids to make sure it all fit. I still have to fab up a copper jumper to connect the master solenoid and the starter solenoid.
I had to mow off the end of the bolt that mounts the boost pump to the doubler. It interfered with the lower part of the engine mount. I just cut it off with my dremel and polished it.
Installed the brake master cylinder on the upper part of the firewall.
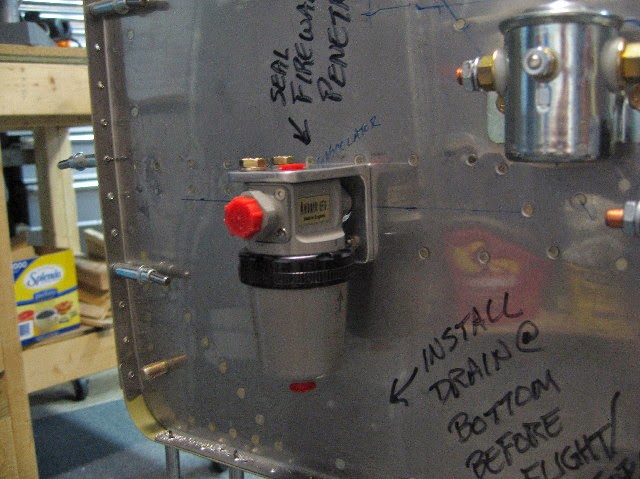
When I was at SNF this year I got a gascolator and fuel valve from Andy at Andair. I didn't get the mount, so I fabbed one up from some very beefy scrap angle. Overkill, but it's all I had and I saw no need to order something special (Nick jokingly said I should use some Carbon Fiber angle).
I made it too big since that's how big the scrap was. I needed it to stand proud of the FW a bit so the drain would clear the lower engine mount.
Drilled but not trimmed yet. Looks like it will work.
Lousy picture, but you get the drift. I mounted it sideways so the supply side would stick right through. I used Van's gascolator doubler which in in the next picture.
The grey part with the blue AN fitting through it is Van's gascolator doubler. I used a step drill to make a hole for a 3/8" AN right angle fitting. That will connect to the Facet boost pump.
Fabricating the supply line from the boost pump to the gascolator. The note is to remind me to final install the fitting and torque. I started to final install it, but realized I might have to take it back out so I didn't use any #3 permatex on it.
The doubler plate and nutplates just above the fuel line are the mounts for the solenoids.
More notes to remind me to finish up some items I can't do yet.
 |
| From Finish Kit |
Once all that was done, I added some more support to the front side of my stand so I could mount the engine. I thought about putting the gear on, but I don't want to lose that much space yet. I think I can make this work. Basically I took an old moving dolly and just beefed it up and tied it to the structure under the spar carrythrough.
Now that all that is done, it's time to install the engine. Superior O-320, 160HP. I got this from Aerosport Power in Canada.
Our EAA chapter has a hoist (that is towable no less!) so I borrowed that.
My first attempt was less than stellar. I spent about 2 1/2 hours trying to get the engine mounted Saturday morning, and got nowhere. I followed the plans and writeups and installed the top two bolts no problem, but those are easy. I could *not* get the bottom bolts in for anything.
For you non-airplane types, this engine uses something called a Dynafocal mount. If you look closely, you'll see that all the mounts are angled toward each other and point to a focal point somewhere near the nose of the engine. The angles make getting this all to fit very interesting to say the least.
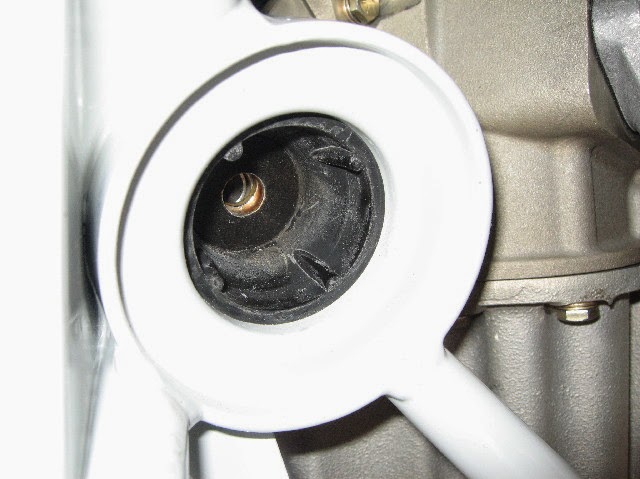
This is a picture of the "soft" side of one of the Lord mounts. I forgot to take a picture of the hard side and at this point they were all in tight spaces so I wasn't going to take it back out. The hard side is gold anodized and is a bit shorter with a ridge around it. The two pieces sandwich the mount with a cushioned bushing in the middle, and the whole thing is tightened down with a large bolt.
This is the cushy center. Originally these mounts only had a bushing. Now the bushing is encased in this rubber covered gel fitting.
Looking into the other side of the mount which is wedged between the engine and the mount. All the holes have to line up. The bushing unit sockets into this hole and the bolt holds it all together.
Fini! Relax and enjoy the moment for a bit.
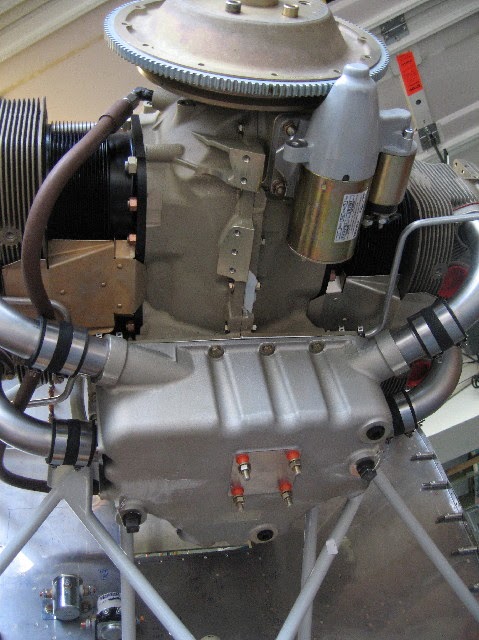
Lower side of the engine. The center plate is where the carb goes - I won't install that until later. The large box on the bottom is the induction system and oil pan. The induction goes vertically through the updraft carb, then is routed to the cylinders through the intake pipes going out the sides.
Upper side of the engine. Horizontally opposed, 320 cu in. The oil filter is on the back. The mags are not the usual mags - I'm using Emagair P-Mags, which are a much improved electronic ignition system.
Closeup of the P Mag.
After basking in the glow of finishing the engine mounting, I decided to test fit the exhaust. This is a Vetterman unit I got straight from them. Saved about $100 vs. getting it from Van's, and it's the same thing.
This is just a test fit. I was very impressed with the fit of all the parts. Perfect.
The workmanship on this is evident. These guys know how to weld. Beautiful work. This is a twist attach they have - no clamps. Fit perfectly.
Here's the whole thing. There are ball joints at the lower back so you can adjust it. Fits great.


