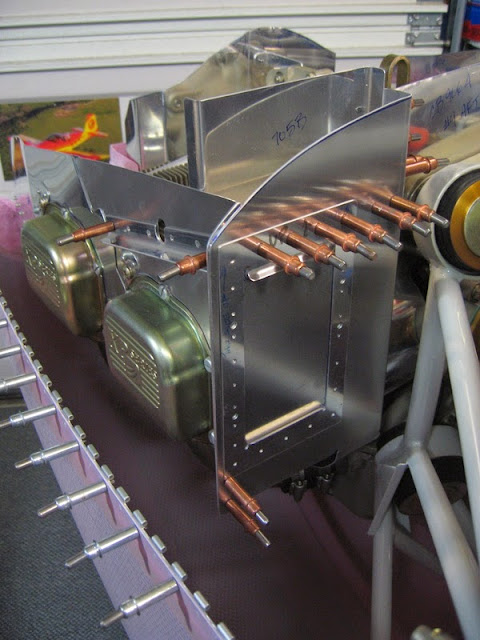
However - for now, back to the baffles. Once I finished up the radiused piece for the left forward baffle, I trimmed it to fit, match drilled it and started riveting it to the left and bottom forward baffles.
 |
| From Finish Kit |
At that point, I had done about as much as I could do as far as fabricating/riveting. The aft pieces have to be trimmed before you can start working on them. This is what it looked like at this point.
 |
| From Finish Kit |
The idea here is that the baffles enclose the fresh intake air coming in from the left and right cheek openings into the upper engine compartment. The air needs to pass vertically through the cylinder cooling fins, cooling the cylinders, then pass downward and out an opening at the lower back of the cowl.
To ensure a completely tight seal, the baffles are trimmed so there is no more than 1/2" clearance between their upper edges and the fiberglass cowling.
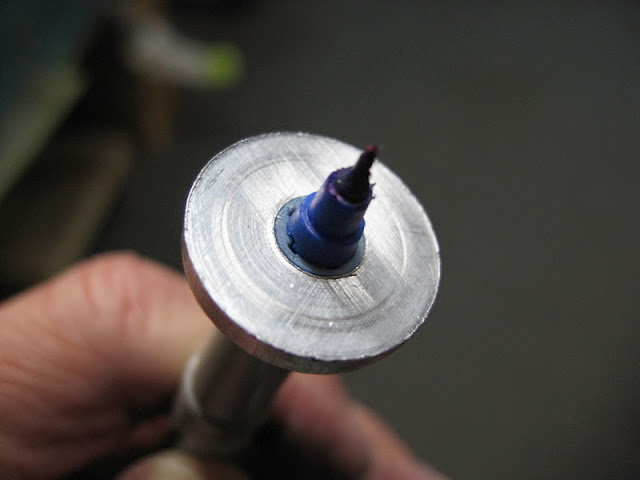
To do that, there are a couple of techniques - what I did is made a 1" diameter washer out of scrap aluminum and drilled a center hole in it that is a tight fit over a fine point Sharpie.
 |
| From Finish Kit |
By running the washer along the cowl I can then draw a line that is exactly 1/2" below the cowl.
This is a very iterative process. The baffles are quite a bit oversized - at least 2" taller than they need to be, so the drill is to set the cowl on, draw the lines, trim, put the cowl back again, mark the lines, trim, etc.
To get a really good fit I probably did that sequence 8 or 9 times at least. Here you can see me getting pretty close - the blue lines are visible in places. Because it is a tight fit, at times it's easier to remove one or more of the aft or side baffles to get into a very tight place and mark the lines. I also did the forward pieces separately.
 |
| From Finish Kit |
Eventually you get to the point where the marker is just touching the top of the trimmed baffle and you're done.
 |
| From Finish Kit |
 |
| From Finish Kit |
Having finished all that, it's then time to fab up the oil cooler mounting.
I thought very hard about mounting it on the forward slope ahead of #2. Our Cherokee has the oil cooler there and it runs cool all the time - almost *too* cool in fact. At the end of the day I decided to stick with the stock location. It obviously has worked well for a lot of folks - no reason to presume it won't work for me either.
If you look at the picture below and compare it to the plans, but I made a major mistake here. I turned the doubler upside down at some point right before I drilled it to the aft baffle. That places the two widely spaced mounting holes (which are supposed to go on the outboard side) on the inboard side.
Because of the way the baffle fits against the cylinder fins, there is no way it can go that way. I flipped it over hoping the holes would fall in spots that could be redrilled and possibly salvaged. Unfortunately there are several places the holes just don't match up and there would be insufficient edge distance. I had to re-order several of these pieces and wait for them to arrive before I could proceed.
As you can see, the closely spaced nutplate holes are left, and the widely spaced holes are right.
 |
| From Finish Kit |
The plans clearly show the widely spaced nutplates to the left. :< argghhhh!
 |
| From Finish Kit |
While I was waiting for the parts, I did some electrical system planning, and went ahead and fabricated the under cylinder rods from the supplied stainless. Threading this stuff is tough, but good cutting oil helps a lot.
 |
| From Finish Kit |
These guys will get some tubing around them to prevent chafing/vibration problems down the road.
 |
| From Finish Kit |
I also went ahead and made a hole for the spark plug wire support on the aft side of #3.
 |
| From Finish Kit |
 |
| From Finish Kit |
After waiting about a week, I got the new parts and proceeded to re-do all the aft left side baffles around #4 cylinder.
 |
| From Finish Kit |
Some folks with earlier baffle kits had problems with vibration in the aft right corner here because of the weight of the oil cooler and vibration. Tim Ribble and Jeff Moreau both had to add a reinforcing angle tied from the far right corner to a crankcase bolt near the center of the engine.
This kit comes with a much beefier box structure there which seems to be very strong. We'll have to see how it holds up under use.
 |
| From Finish Kit |
I got the holes in the right places this time. :)
 |
| From Finish Kit |
Once everything was trimmed, fit and drilled, it was time to rivet it all together.
 |
| From Finish Kit |