The last couple of weeks (more like months actually) have been really crazy at work. Still managed to finish the cowl about as far as I can go without warmer weather (or heat) to do fiberglass work. Once I finished that up, I started on the baffles.
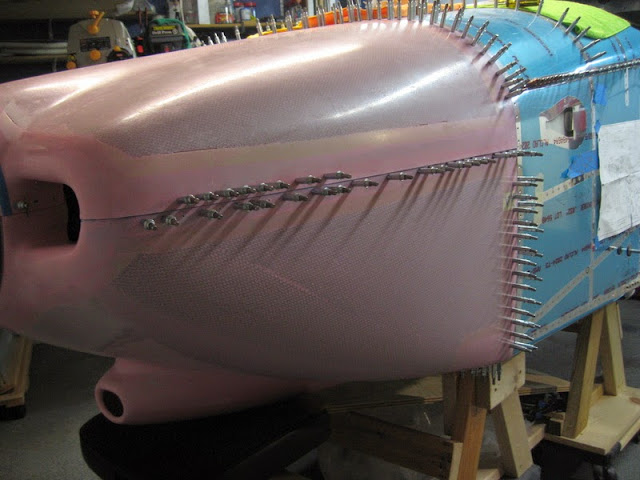
This is a shot of where I was on the cowl when I started. You can't tell, but the top hinges are fitted and I'm working on the bottom. I'm basically following what Van and other folks recommend - trim the bottom so it will slide up, then work the aft sides, then finally do the fitting along the long left and right joints. I had to trim away a fair bit of the nose inlet so I could get it reasonably close.
Lower cowl - all four edges have been trimmed and hinges fitted. I started using a dremel for the trimming, which worked great, but I did the entire lower cowl using sheet metal shears - easily as accurate as the dremel, way less messy and very easy to do.
I originally planned to get one of the nice long extruded sanding blocks the fiberglass guys use, but I had a spare piece of 1 1/2 by aluminum I used as a jig for my empennage and tried using spray contact adhesive to attach some good corundum sandpaper to. Worked like a dream, and much cheaper. This is about 3 foot long - makes a perfectly straight edge very easy to do.
Laying out the sides for trimming.
 |
| From Finish Kit |
Marking the side hinges for drilling. Used the same approach as the rest - drilled then hinges, then match drilled them to the cowl.
Working my way down the sides match drilling the hinges.
Using my portal LED trouble light to illuminate the hinge for match drilling. Worked great.
Cowl more or less fitted. I'm going to defer riveting until I get the baffles and prop fit. That way if I'm off, I can just fill in the holes and re-trim/drill as necessary later.
Starting on the baffles. They needed to be trimmed a bit to clear the gaskets on the valve covers.
It's so shiny it's hard to see, but the bit at the back is the baffle behind #3 cylinder.
Most of the back and sides in place and test fit.
Starting on the #1 forward baffle.
Reinforcements for the sides. I stacked them to make them easier to deburr en masse on the bench grinder.
High level view of the whole thing. Mostly mocked up at this point. There is a lot of fitting and trimming yet to come.
The front on both sides is way too big - need to be bent upward and trimmed way back.